

« Previous step: Folder Structure
You can do a huge amount of work in your PAT Phase 1 report before you even have your Topic: the format of the PAT remains almost 100% consistent from year to year! Grade 11’s and 12’s should already be familiar with much of the process, Grade 10’s: some of the instructions may seem a bit odd until you see your final PAT and understand that it is all part of the process!
In this post:
Required knowledge:
1. Language
Set the proofing language of your Word Document to English (United Kingdom).
This is a business report so you must use formal language, that is, Standard British English:
- Do not use abbreviations without first typing them out in full when the term is first used (after doing this you can use the abbreviation on its own), like so:
“South Africa is experiencing load shedding which makes an Uninterruptable Power Supply (“UPS”) an essential part of your computer set-up.” - All your dates must be in a long date format, for example, 11 September 1971.
2. Styles
Choose your fonts carefully; read the post Font faces for a formal report.
Start setting up your styles before you begin adding content to your document — you can always update them later. You must use at least 3 styles: Heading 1, Heading 2 and Heading 3, and of course, you will also automatically be using the Normal style.
- Normal style should be font size 12 (not the default, 11). Be sure to use a straightforward, easy-to-read sans-serif font like Arial, Calibri, etc. Set your line and paragraph spacing appropriately.
- Heading 1, Heading 2, and Heading 3 should use the same font style and colour as each other and must be larger than size than the Normal style. You can use a slightly more stylish serif font, such as Garamond, for your headings, but do not use any of the more outlandish fonts, like Algerian, Broadway or any of the cursive fonts or Capital letter fonts which are hard to read and are not suitable in a professional context.
- Use different font sizes, with Heading 1 being the largest and Heading 3 the smallest.
- Set the before and after paragraph spacing for your heading styles (add at least 6pt after).
It is a good idea to use placeholder text in your document so that you can fine-tune your formatting right from the beginning — even your Normal style should be modified!
3. Cover page
For now, simply add the following to the first page (which will become your Cover Page).
- your full name & surname, e.g. Another Learner
- your grade, e.g. Grade 10
- the full name of your school, e.g. SACS High School
- the full subject name: Computer Applications Technology
- the text PAT Topic (to be replaced when the actual Topic is announced)
- the due date, in long date format, e.g.: 25 July 2021
Do not use abbreviations and capitalise, as necessary.
4. Minimum headings
Each year, with very little change, the following pages and headings will be necessary — go ahead and create them (remember to use Styles to format them: the 1st level numbered headings should be Heading 1 & the 2nd level numbered items should be Heading 2). Each heading should be on a new page. Your Appendices must be in a separate Section so you can insert a Section Page Break after your Bibliography rather than the usual Page Break.
The exact sequence of the Addendums is not critical – keep them in a logical order.
- (Cover page)
- (Table of Contents)
- Table of Figures
- Focus Question
- Task Definition
- Introduction
- Discussion & Analysis
- Findings
- Conclusion
- Bibliography
- Appendices
- Addendum A: Research Questions (with table)
- Addendum B: Source details (with 3 tables)
- Addendum C: Evaluation of Sources (with 3 tables)
- Addendum D: Summaries (10 level 3 headings, linked to questions in Research Questions table)
- Addendum E: Learner Declaration of Authenticity (with details completed)
- Addendum F: Folder structure screenshot
- Addendum G: Questionnaire
5. Bibliography
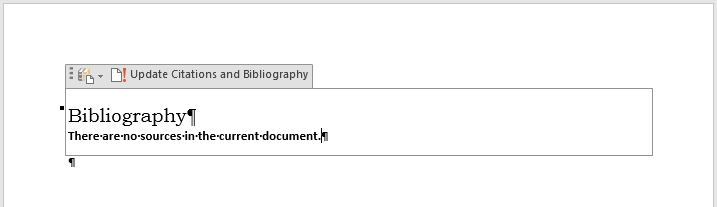
Instead of simply typing a placeholder heading for your Bibliography, nothing is stopping you from adding the automatic Bibliography field now (it will appear as below because you have not yet created your sources):
Read more about your PAT bibliography in the post: Creating your bibliography in Microsoft Word.
6. Page numbering
You should set your page numbering up as well — pop over to the post dealing specifically with automatic Page Numbering in Word for all the details.
Top Tip:
Keep checking back with your Table of Contents — update the field and check that the Styles have been applied correctly and that the page numbering is correct!
7. Table of Contents
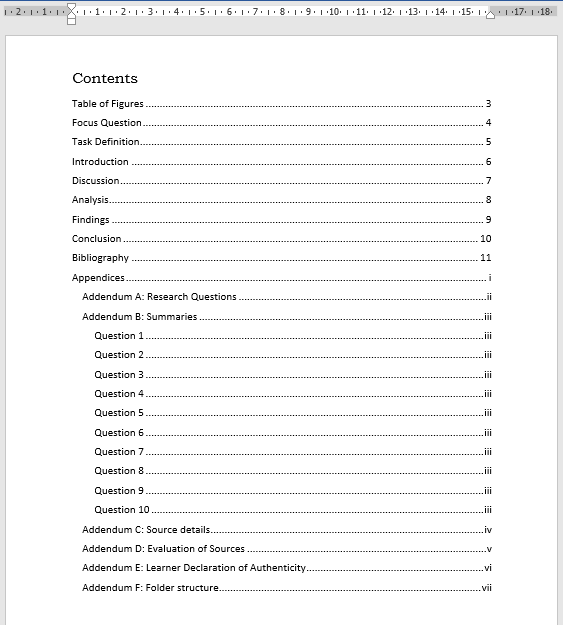
Even before you have your topic or any content you can have a document with an automatic Table of Contents similar to the one pictured below (remember: the Table of Contents feature relies on the correct use of Styles):
The Grade 10 Learner Guide for 2020 specifies that you create your Table of Contents manually using tabs with leader lines. If you use the automatic Table of Contents instead, you must ensure that you demonstrate the skill of creating tabs with leader lines elsewhere to fulfil the PAT requirement.
8. Research Questions table
Add your Research Questions table, 3 Source details tables, Source evaluation tables and Learner Declaration to your outline as well.
Grade 10s: do not include the “TYPE OF SOURCE” column.
| NO | QUESTION | CATEGORY | QUESTION LEVEL | TYPE OF SOURCE | BIBLIOGRAPHICAL INFORMATION | SUMMARY |
|---|---|---|---|---|---|---|
| 1 | ||||||
| … | ||||||
| 10 |
If your third source was also found online, provide a URL.
9. Source details tables
You must provide the full details of 3 of the sources. 2 of those sources must be websites, and the 3rd must be a source other than a website. Create tables for these details in Addendum C: Source details.
You will need 2 tables like this one:
| SOURCE DETAILS FOR QUESTION 1 (WEBSITE) | |
|---|---|
| Author | |
| Website name | |
| Webpage name | |
| Date published | |
| Date accessed | |
| URL | |
And a third table similar to this (the headings will vary depending on what type of source you choose later):
| SOURCE DETAILS FOR QUESTION 3 (BOOK) | |
|---|---|
| Author | |
| Title | |
| Year published | |
| City published | |
| Publisher | |
The source details in the source details tables will be used to create your sources in your Word document. Therefore, if you need to know what information to collect for a less common type of source, simply open the Source Manager, click the add source button and select the relevant type of source from the drop-down to see which fields are required for that type of source.

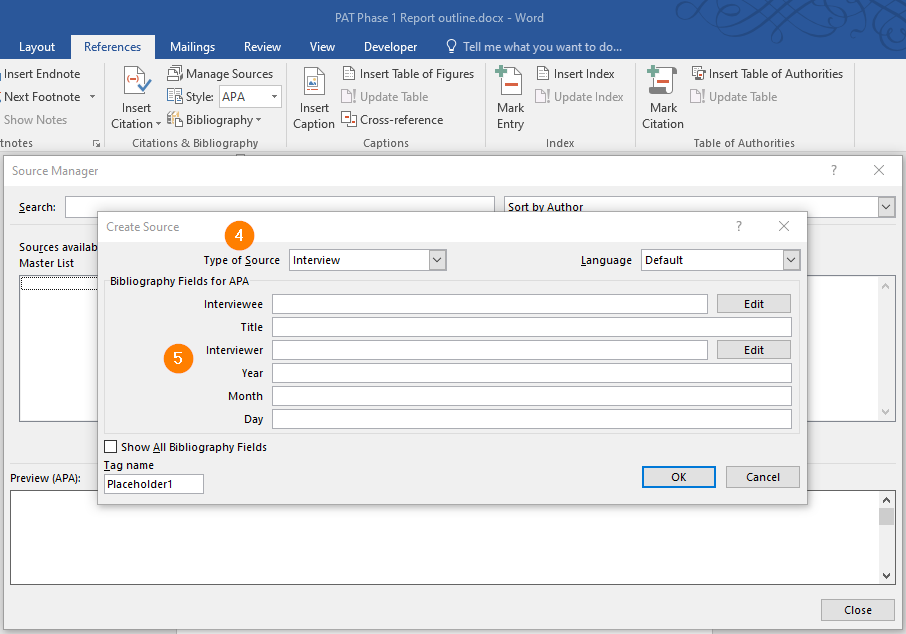
- Select the References menu tab
- Click on the Manage Sources button
- Click on the New button
- Select the type of source from the Type of Source drop-down
- View the input boxes that you will be required to complete for that specific type of source
10. Table captions
All of your tables must have captions. You can add them now.

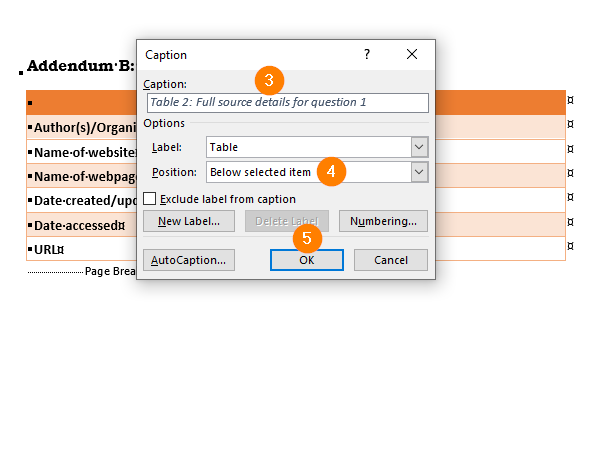
- Select the table by clicking inside the table and then left-clicking on the table selector at the top left of the table.
- Right-click the selected table and left-click the Insert Caption option.
- Add your caption.
- Select the Position (I prefer the caption to be below the table)
- Click on OK.
11. Table of Tables
Once you have started adding captions to your tables, you can add a Table of Tables beneath the appropriate heading. The Insert Table of Figures command button is on the References menu.
12. Table styling
Style your tables so that they look the same, remember consistency, consistency, consistency!
The instructions for additional table settings are in the post Phase 3 Final Report, but you should deal with them now and then check them again in each Phase!
Next step: Learner Declaration of Authenticity »
Hi David
This is beautiful!
I have started something similar by creating a slide deck which shows a few examples of what each part of phase 1 needs to look like. I include screenshots from the PAT document.
Do you also find that learners don’t really want to read through that guideline document?
* the link to “Cover Page” takes one to the task description. (not sure if that’s intentional).
Hi Nellie
Where can I find your slide deck with examples?
Hi David, I love what you did here. I just wish it was also available in Afrikaans to help my students better. We are on the same whatsapp group with Adam and was also together in a workshop. It is actually my first year(since last March) that I teach CAT and this year I have the matrics also. I love teaching CAT. If you have some brilliant ideas would you please share them with me. I have gr 10- 12. Thank you
Thanks, Carlene!
I have loads of PowerPoint presentations that I use in class. I am trying to put all of that information online so that my Learners can access it when they are not in class (Grade 10 and 11’s are on rotation).
I am also working on converting Matric papers into self-marking Google Form Quizzes for Learners to use as preparation.
I am using Google Classroom extensively to create checkpoints for PAT progress – that way I can check progress at this time when we are not able to go to a Learners desk to see their work.
Please give me any feedback and keep an eye out for new posts. I only teach CAT in English so I am afraid translations are a way off…